Each attribute can be set up to add options that are free, and also ones that will add additional charges to the product price based on the selections chosen. You can add in up to 20 attributes per product, and you may create an unlimited number of options per attribute.
An example of an attribute would be "Color", while the options for that attribute example may be "Red", "Green", "Blue", etc.
Using a slightly more complex variation of the above example, your product with attributes may look like this on the customer side of your store:
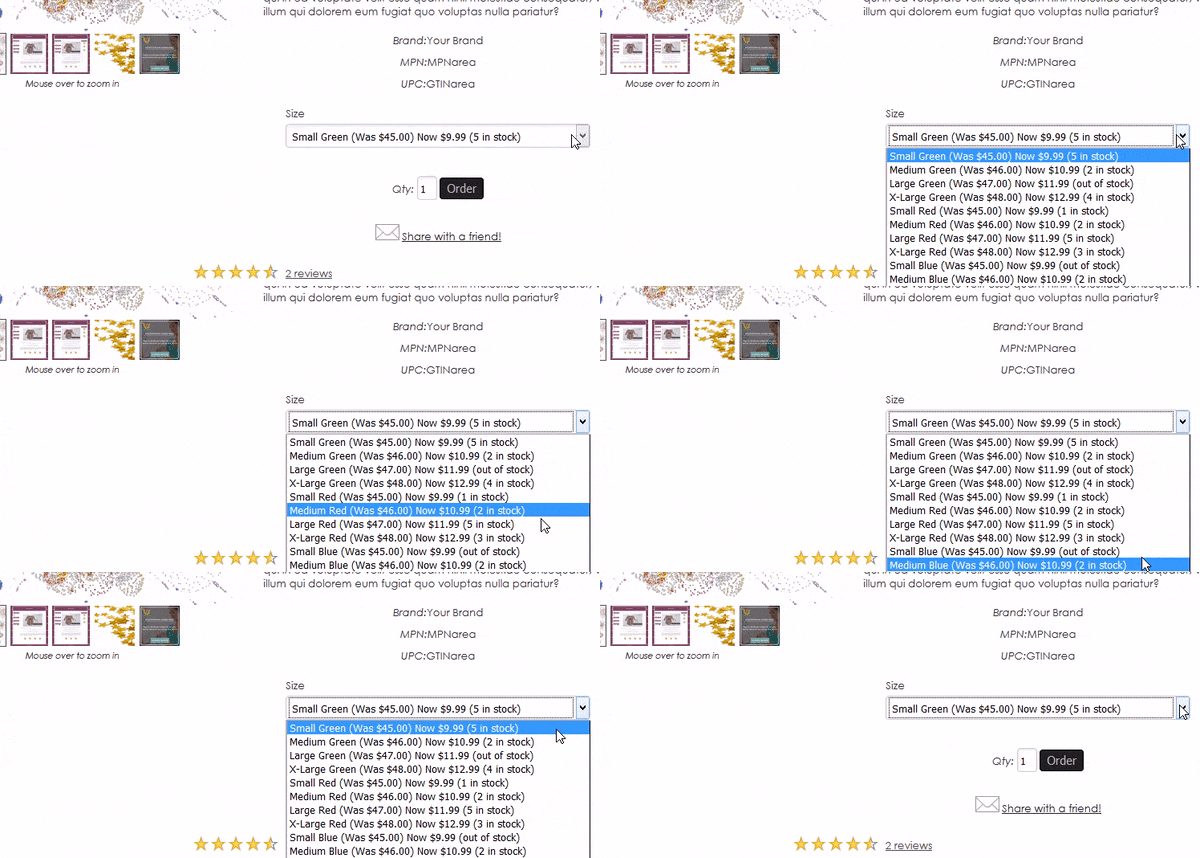
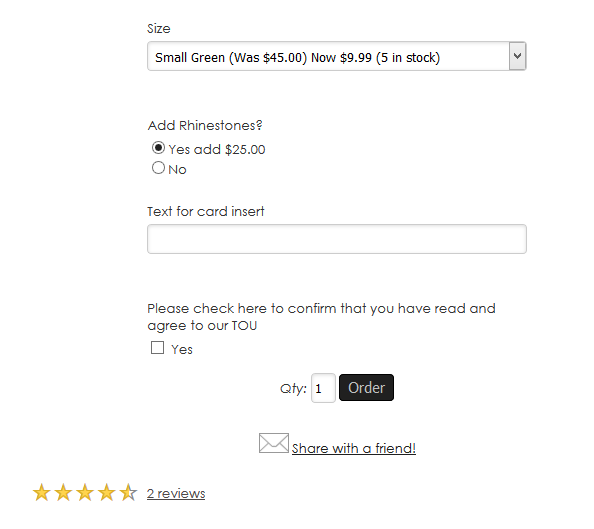
From your store admin area, the attributes example above looks like:
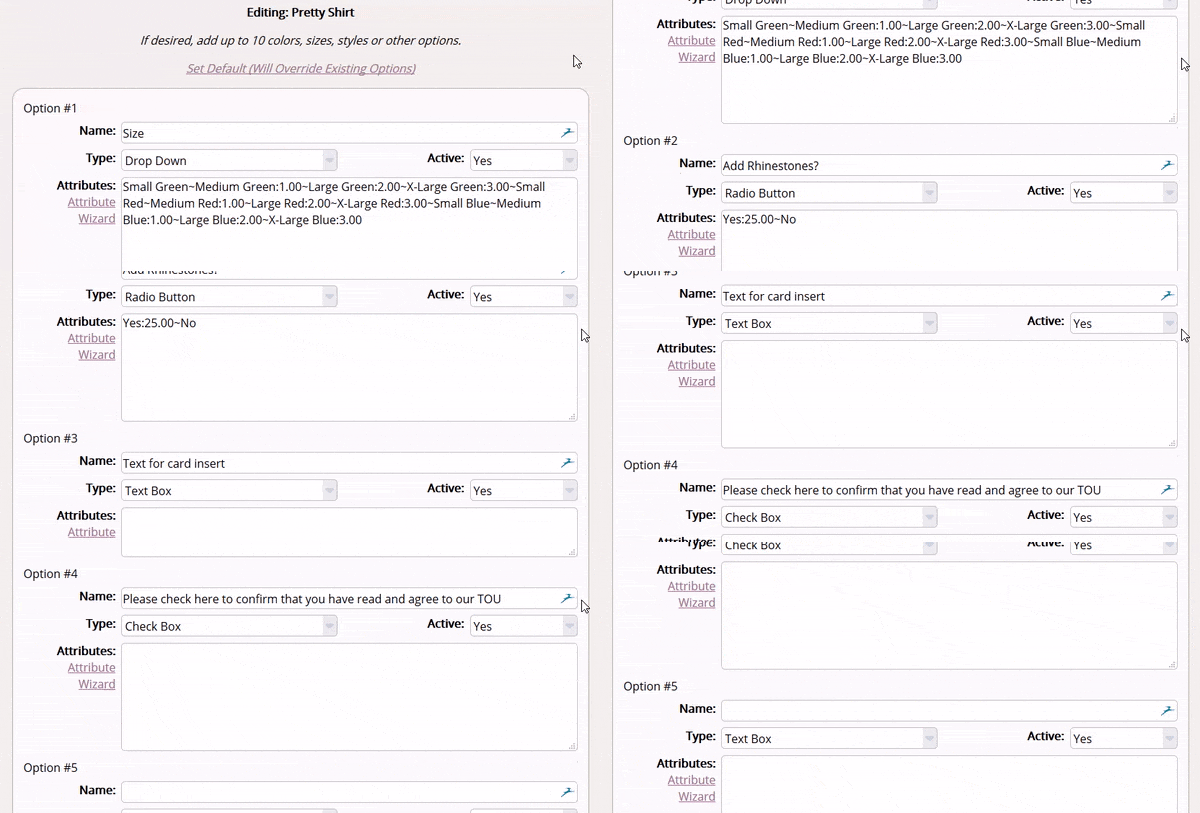
To easily create these attribute options, you can click on the pink "Attribute Wizard" link. This will present you with a pop up that will let you enter your details for each attribute and option for your product. For example:
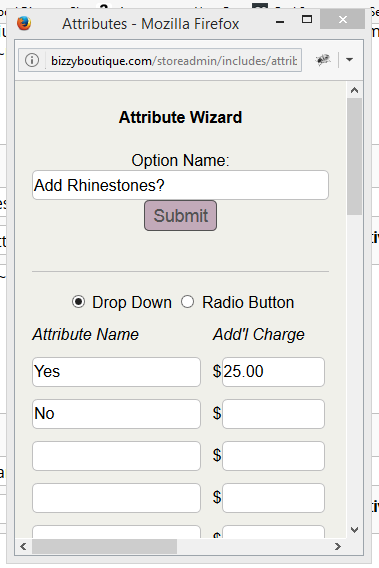
Clicking on the "Submit" button and then "Update Attributes" link will save your changes from here. The attributes wizard works best for adding in a drop down menu, or radio buttons. For a text area, you will be able to create this on the main attributes page. You can also create checkbox and a memo field on this screen. A memo field is a larger text box entry area.
Adding in attributes step by step:
- Log into your store admin.
- Navigate to the "Products" link under "E-Store".
- Add a new product, or choose the product that would would like to add attributes for.
- Scroll down to the bottom on the product create/edit page, and find the "Add Options" button.
- Click "Add Options". You will be able to add attributes on this screen. Be sure to save your changes.
Adding in Stock by attributes:
- Log into your store admin
- Navigate to the "Products" link under "E-Store".
- Add a new product, or choose the product that would would like to add attributes for.
- Scroll down to the bottom on the product create/edit page, and find the "Add Options" button.
- Click "Add Options". You will be able to add attributes on this screen. Be sure to save your changes.
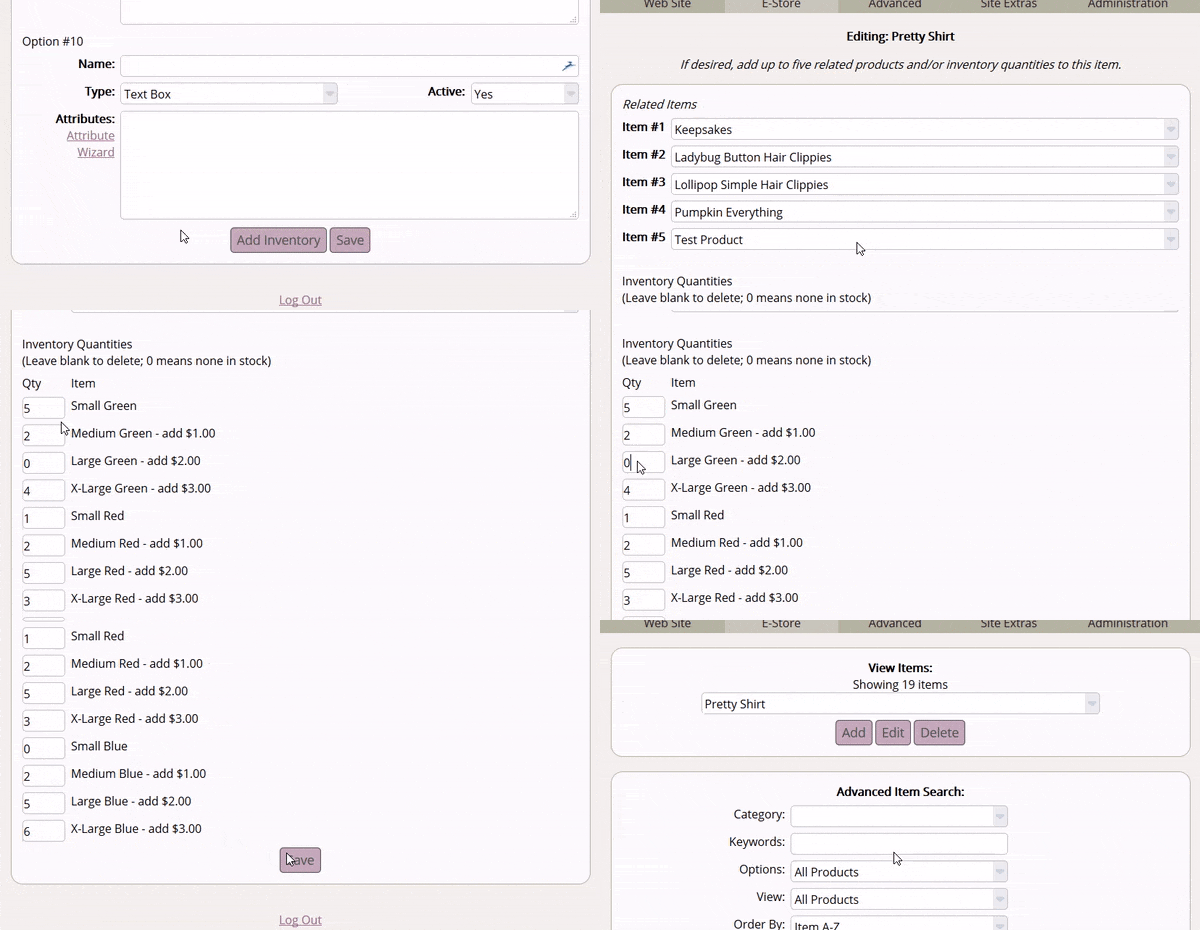
- Instead of saving from the attributes page click the "add inventory" button.
- Set inventory quantities as directed. You can also set up "related products" from this screen. These items will show under the item you are creating as a way to direct customers to other, related things they may be interested in.
Last Updated: 04/13/2017

